Wednesday, December 30, 2009

Look what Hubby got for Christmas!

No more lugging each armload of firewood up 3 steps into the house!


What a back-and-knee saver! I found this handy wood-hauler through Lehman's online store. I had been looking for something like this for the last couple years but nothing I found was this sturdy. We need to make adjustments as we get older to keep living the country life that we so love.


The wheels are spaced so that we can just roll it back the hall, through the door, and let it set on the top step as we fill it from the side. It holds about twice the wood you see on it here; plenty for 24 hrs in our stove. We are going to enjoy this handy tool!

Wednesday, December 23, 2009

More wood-stove baking

This is the oatmeal bread I baked a week ago but was not able to post the pic b/c my knee has given me trouble again and I couldn't get upstairs to the 'puter I use to download my pictures. But as you can see, it is possible to make nice even and evenly browned loaves of bread in a wood cook-stove oven. If anyone would like the recipe just email me or leave a comment.


I made these Banana-nut muffins the other day as I had bananas coming out my ears and needed to get them used. This is one of Hubby's favorites. My oven wasn't quite up to temp (400*) but they baked well anyway. It has to do more with keeping the temperature even during the baking process.


Since I am not going to get to make Christmas cookies as usual this year, I would delight in at least seeing what any of you have made. Are you baking in a wood stove oven? Or an oven on top of your wood-stove? I'd like to hear....

You all have a warm, merry and Blessed Christmas!

Thursday, December 10, 2009

Getting Chummy with Your Wood Cook-Stove

Wednesday snuck up on me this week!

Actually I haven't cooked much on my woodstove this week as I had been trying to use up leftovers from the huge meatloaf I'd baked in the oven over the weekend. I had also made 4 loaves of my easy oatmeal bread.

Baking in the oven is not hard. Once you get your oven going at a nice even temperature that will hold for about 45 min at least, you are set to bake your bread. The main point here, at least for me, is to remember to turn the bread pans around about 2/3 way through the baking to allow them to brown evenly.

Maintaining even temps in your oven does take practice, but dont be discouraged; every oven is different. Take some time to getting to know your particular stove. It just takes a little attention to detail.

As for a meat loaf or a roast, again, once your fire is stable for however long it takes to cook your meat, it is much the same as baking it in gas or electric oven, except for the richer flavor that is :)

If you cook on a woodstove, please leave links to your blogs so we can all learn from each other. Also, do any of you have a grandmother, mom or aunt who used to cook with wood? Tell us your fond memories of it.

Thanks for visiting! Happy wood-stove cooking!

Wednesday, December 2, 2009

Wood-stove Cookin' Wednesdays!

Welcome to the first post on Wood-stove Cookin' Wednesdays!


Nothing tastes better that food cooked on a wood-stove! It replaces the need for electric wintertime crock-pots, and can pop up popcorn to out-do Or*ill Reden*ocker !

There are many wood cook-stoves available to choose from. We happened to choose an Amish-made Kitchen Queen because of the larger fire-box and oven. You can also cook on the surface of any number of wood heating stoves, if that is what you happen to have.

The basic requirements for keeping a wood-stove in good operating condition are the same, whether it is a heating stove or a cook stove.


1. Keep the ashes cleaned out and the chimney clear of creosote.


2. Use dry, seasoned firewood, not green wood; as green wood tends to cause more creosote build-up.


3. Have a good supply of kindling, and a couple different sizes (diameter) of firewood for varying degrees of heat.


4. Allow the stove to heat up slowly; don't build a "fast fire " all at once or you run the risk of warping the grids and sides of the fire box.

The best varieties of wood are oak, maple, apple, walnut or any of the other hardwoods. We have used pine and hemlock also. You will likely need to use whatever is available in your area. Get to know the kinds of wood, their heat out-put and burn times.


These few simple tips will have you well on your way to successful cooking on your wood-stove!
We welcome any and all comments, tips and experiences! We will try to find a way to link up with other wood-stove cooks!

Tuesday, November 17, 2009

What does Breakfast Mean to You?

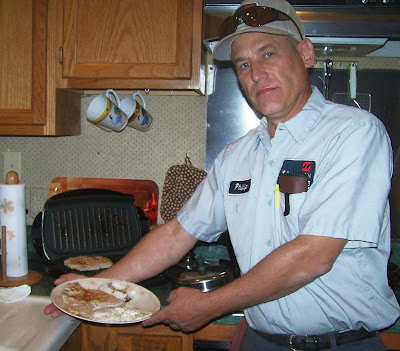
Dear hubby took over in the kitchen the other day :)


This is what he calls a "Now-I've-had-breakfast-I-can-get-to-work" meal! Didn't even need the toast!

Wednesday, November 4, 2009

Country Cookin'


I had a small Golden Hubbard squash I have been wanting to bake, but still too warm this week for the wood stove so I did it in my regular oven.

I cut it in half and removed seeds, baked it for 30 min, then filled it with sausage balls (cooked till done in my iron skillet) topped it with walnuts, dried cranberries and a little bit of brown sugar, and baked 20 more mins. Doesn't it look scrumptious??? It was!

Friday, October 23, 2009

Neat give-away

Hey ya'll! I have just been over to Kentucky Farm Girl's blog, and she has a wonderful give-away
going till Oct. 29th. Take a hike on over and look at what all is there! Just click on this link, "Sit-Back-and-Relax" give-away

While you are there, be sure to give her a nice country "Howdy!" and check out her other posts. Very informative! I especially liked her post on how to make a bird suet feeder out of a piece of tree limb!

Saturday, October 17, 2009

Re-visiting Nutrition

I think it is good from time to time to do a check-up on the foods we are taking in, at least for us. It is easy to slip back into " it tastes good so I'll get it , just for a treat". Since I am packing hubby's lunch once again, it has become too easy to pick up bags of chips at the grocery store to include in his lunch. Not only is that expensive but has no nutritional value. I usually pack a good sandwich on whole-grain bread, a fruit of some kind, or cottage cheese and fruit, and a couple homemade cookies or pie.


I decided to make my own trail-mix with items I had picked up at the bulk foods store. It contains a pretzel mix, dried pineapple, apricots, cranberries, raisins, cashews, and a few dark chocolate chips. I would have put in brazil nuts if I'd had any, and some pumpkin seeds. Maybe next trip.

Those of you that pack lunches, what do you add for a nutritional snack?

Wednesday, October 14, 2009

Fall is in the Air

Nothing like crisp fall air to make a person want to gather the last bouquet of the season and cook up some heart-warming food!


Below is rabbit stuffed with Cranberry-Walnut stuffing on a bed of seasoned brown rice, chunky applesauce, and a Turk's Turban Squash pie.


I also made a Bean n' Barley soup with Kielbasa. In addition, a Skillet-Corn-Bread makes this a nutritious meal!


Now if that wouldn't warm your tummy, I don't know what would!

Thursday, September 24, 2009

My Frugal Hubby ... on using what you have ...

Time to fence in the new 16-acre field that hubby made hay from this year (we have one week to get our fencing materials together )


We have fence posts that we brought with us years ago when we moved here, many of them pretty rusted up, bent, and many too short, all different lengths. But when my hubby goes to work on something he does a terrific job! And thankfully, over the years, he has accumulated the needed tools and taken very good care of them.......


He needed 100 T- posts to go in between the wood posts, and at about $5 or more each for new, he decided to keep his money in his wallet and make do with what he had. Step by step, and spending many evenings after work he got the job done.

1. Weld posts together to make them all long enough and all the same length


2. Wire brush to remove all rust, with a grinder tool and wire brush disks


3. Move what he can out of the workshop to set up room to paint them, as we have been having rainy weather here for eons.


4.Paint and try to get dry running a little heat in there.... Flip and paint the other side... then again.


Finished product.... 97 like new t-posts!


My hubby is one frugal dude! We are ready for fencing to begin!

Monday, September 21, 2009

Fall Garden

The peas poked their heads up out of the ground about a week after I had planted them. We had just about the right amount of rain to give them a good start.I plan to get some wire strung for them to climb on


The lettuce is also up ...


and the zucchini ...


and the swiss chard


We are also having a fall crop of raspberries...


I am going to re-seed in some spinach and it is about time to put in the garlic. My asparagus replacement plants will be coming in the mail any day now.

If you are growing fall garden veggies I would like to know how yours are doing.

My Mom's Chunky Applesauce


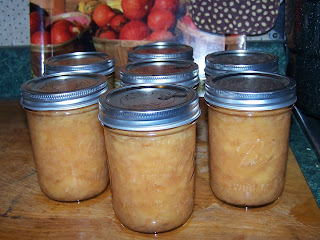
My mom always made chunky applesauce when she had the time. It is simple to make, just more time consuming. but that is the way we like it best. I was fortunate to get some apples this year that were pretty good and I decided it was worth the extra effort.


I cored and peeled, and cored and peeled, instead of running through a food mill. When I got a kettle full of apple chunks I put them on to cook over a med-low fire with about a half-cup of water in the bottom. I let them cook down and then mashed them into smaller chunks with a hand potato masher. I do not add any sugar or cinnamon until the jar is opened to be used. That way if a lid happens to come unsealed without your knowledge, you only lose the apples. Besides, most of the applesauce I've canned actually needs no sugar.


As the sauce and jars were hot , I just filled the jars and placed each one in a boiling water bath as it was readied. I processed 30 min for pints.


I made 20 pts this way . This chunky applesauce is good just as is. But, also a good alternative topping for pancakes or waffles. Nothing like having your own home-processed food the way you prefer!

Thursday, September 3, 2009

New Office Mascot

Hi everybody! ...... Meet "Bailey"!


There is quite a story behind Bailey. For the full scoop, go here

Thursday, August 27, 2009

Fall garden

I don't really know much about how other people in Kentucky do with their gardens, but I am going to be experimenting with fall gardening this year. Besides, I felt a little cheated this spring with all the constant rain preventing me from planting a good bit of my veggies.


I have planted a double row of Sugar Snap peas, 2 double rows of English peas, some mixed lettuce, baby spinach, and swiss chard. That is sweet potato vines you can see to the right of the new rows.

I also used 1 row and sprinkled in some cabbage, broccoli, and cauliflower seed to see if it would germinate and grow. I covered all rows with a thin layer of straw, like when you plant grass seed, figuring it might shade the seedlings til they get a start and also help keep the ground from drying out so fast.

Then early this morning I soaked it all down good with the sprinkler....... well, to be quite honest, I almost flooded the garden area because I got busy and forgot to turn the sprinkler off until 7:30 tonight. So the seeds are good and soaked. We are due for some rain the next couple days and cooler weather the next week so I thought I'd just "stablize the seed" by giving the ground a good soaking. Time will tell if anything grows.

I also had to sit down in the shade from time to time under the pin oak tree in the yard next to the garden. Look what grew up beside my garden chair this summer .... another little volunteer sunflower!

Do any of you in the middle southern states plant a fall garden ? I would like to know what crops you plant and when and what you have had succcess with. All comments welcome.

Wednesday, August 26, 2009

Give credit where credit is due ....

Woohoo! I did it! I made a Susan McMinn Peach Pie !


Thanks so much to Susan for posting this peach pie recipe on her blog, "Chickens in the Road". I have never made a successful peach pie before in my life. Other pretty good pies yes, but not peach. She made it look so good and the recipe was so easy to follow. She has many wonderful recipes posted there.


My hubby was very happy with it! Doesn't it look delicious?
I will also be trying Susan's peach-pit jelly recipe.

Food Preservation - part 2

I love the bright sun coming in my hall entry in the morning as if to say "Good Day" to me on my way to the kitchen


It will be a busy place today with all this........


Yumm! spaghetti sauce, pizza sauce, and canned-tomato time is here! And there are plenty more tomatoes in our garden where these came from ......
Herbs from our herb garden are used to make a nice aromic and flavorful sauce.


..... oregano and basil here .... after cleaning, inspecting the leaves, and removing from stems, I chop them up fine. A pizza wheel run back and forth over them does a great job.

I make my sauce the lazy way, and just whurr the whole tomates in the blender; seeds, skin and all. No waste that way. Then cook it down with added salt, bell peppers, onions, celery, and when reduced in volumn I add the herbs.

Cook another 20 min, add precooked ground beef and sausage, put in jars and process. Spaghetti sauce is done in quart jars, pizza meat sauce (with our own farm-raised beef) on the left is done up in pints, and so are the canned tomatoes..
Nothing like home-made. A lot of work, but every bit worth the trouble. There is something very satisfying about putting up your own food. Time to go pick the next batch of tomatoes!

Wednesday, August 19, 2009

Food Preservation at Our House - part 1

I use many methods of preserving food from our gardens to keep us through the winter months and beyond. I freeze corn, broccoli, melon chunks or balls, grapes; can or freeze green beans; can peaches, pears and applesauce; pickle beets; make saurkraut in the jars; cool-store winter squash and sweet potatoes; and the list goes on .....
This year I am especially enjoying my pepper garden ...... just look at all the colors!


I cut these in strips for fajitas, mixed them with cut up onion, and tossed into freezer bags. Do you know how much this stuff costs in the stores in off season?? Peppers are so easy to freeze.
But they do take up room needed for other things, so ....


I also dehydrated some. This little bag-full came from a good-sized 3-gal pail of peppers!
My oldest daughter now has the dehydrator her grandmother had, an ExCalibur, so last year I bought a new one, same brand, both have 9 trays with a temp control and timer. Great dehydrator!


This morning I was up at 4;45, could not sleep , so I cut up some yellow squash ( great for adding to veg. soups) about 7 small ones, and started them drying.


I also added a sliced roma tomato on one shelf to see how it would turn out.


and there is the finished product. My hubby has also made a mean beef jerky using this dehydrator. That stuff is expensive to buy..... The thing is making sure to get the food dry enough, so mold and bacteria cannot grow.


We did not always have a dehydrator. Years ago I dried my onions, garlic and dry beans on old window screens and covered with cheese-cloth in the sun in the back yard. I hung my herbs from the rafters in the barn loft. Fruit leathers were dried in the oven. As for canning, I had a three burner hot-plate on a home-made stand on the front porch (way out in the country) and made my tomato sauce in a double boiler, one that covered at least 2 burners. One year I canned 700 hundred qts of produce, Well, gracious.... I had 5 children to feed! (#6 came along later) But I never canned that amount after....

We have also canned chicken, rabbit and venison. I may be canning hamburger this year to be able to shut down a freezer and save the utilities. As far as other meat we have also "salt-cured" hams from our home-grown pork... but thats another story ..........

and now I am off to work for a hour on the border of my Grandmother's Flower Garden quilt. A restful end to a busy day!

Tuesday, August 18, 2009

Just a Walk in the Park...

I had started letting the chickens out for about a half hr. before dark so they can run, and eat bugs and greens


My rooster thinks he is just "Cock of the walk"

They sure enjoy the freedom; picking and running and flapping their wings.

I don't leave them out too long or they would find the garden :0
And they all need to be tucked safely in at night. Too many predators looking for an easy meal!
Do you let your chickens free range?

Friday, August 7, 2009

Banana-Applesauce Muffins


I had hurt my back and was down a couple days, but this morning I got up, no pain and feeling full of energy! So I used up my over-ripe bananas in this new (to me) recipe using applesauce instead of oil in a banana bread recipe, only I made muffins instead. They are so moist! .... and nutritionally better for you!

I am going to have one right now for my lunch ..... with cream cheese on it! want some? I'll share...

Thursday, August 6, 2009

Processing Chickens (not for the squeamish...)

We like our chickens and they have a good life while they are here, but the time comes for some of them to serve their purpose.... on our dinner-table.


Here in a nut-shell is how we process them. Hubby takes a sharp axe and with a swift blow cuts the head off, immediately rendering the chicken dead. The nerves of the body still cause it to move some for a couple minutes, but no pain is felt as the brain is seperate from the body. This procedure also allows the carcass to bleed out.

We immediately remove the feathers, skin and inerds, and remove the feet and legs to the first joint, then plunge the bird into a 5 gal. bucket filled with cold, cold water. The bucket will hold about 3 good sized birds, and we change the water frequently. After the chickens are butchered we cut them up into pieces; legs, thighs, breast, backs necks and wings, and put on the stove in large pots to cook until the meat starts to fall off the bone.

While it is still hot, we pick the meat off the bones, pack the jars, and pour broth over them.


Processing takes 1 hr and 15 mins for quarts, and 1 hr for pints, even though it has already been thoroughly cooked.

This makes for a wonderful meal that can be gotten ready in short order. It can be used for chicken and noodles, chicken and biscuits, chicken noodle soup, baked chicken cassarole, chicken sandwiches, and the list goes on and on....
We processed 14 quarts from 12 chickens, one did not seal and went to the fridge, and one went in the freezer. But doesn't this look absolutely yummy? We had chicken and noodles for the first meal with a side dish of fresh green beans from the garden. Another side dish of fried apples compliments it well.

Saturday, August 1, 2009

D-Day

Today is D-Day for the roasters, er.... roosters, red and black both.

We will be keeping several black hens for layers.
Hubby will do the butchering and I will be cooking, cleaning meat off the bones and canning it up . I wonder how many quarts of chicken meat I will get from 12 chickens??